
Decorating my first empty wall was surprisingly intimidating. I was caught in this loop where nothing felt quite right, leaving me totally paralyzed by the options. One afternoon, while flipping through an old craft notebook, I found a sketch of paper butterflies I had doodled years ago, and something about it felt light, playful, and honestly kind of freeing. I grabbed whatever colored paper I had lying around, cut out a few imperfect shapes, and taped them to the wall without overthinking it, and wow, the space instantly felt alive in a way I didn’t expect. It wasn’t perfect, but it felt personal, and that made all the difference.
As I kept adding more butterflies over the next few days, I noticed how the room started to shift in mood depending on the colors and placements I chose, which made the whole process feel oddly therapeutic. There was something calming about folding paper, shaping wings, and watching a plain wall turn into something that felt like it had movement and story. I even caught myself smiling randomly when I walked in, which is not something I usually do over decor, but hey, it just hit different. That’s when I realized that sometimes the simplest DIY projects can have the biggest emotional impact.
Now, whenever someone asks me for easy, budget-friendly decor ideas that don’t feel boring or overdone, paper butterfly walls are always my go-to recommendation. They’re versatile, creative, and honestly kind of addictive once you start experimenting with different styles and layouts. Plus, you don’t need fancy tools or expensive materials, which makes it even better if you’re just trying to refresh your space without spending too much. So if you’ve been staring at your walls wondering what to do with them, you’re about to find some seriously fun ideas that you can actually pull off.
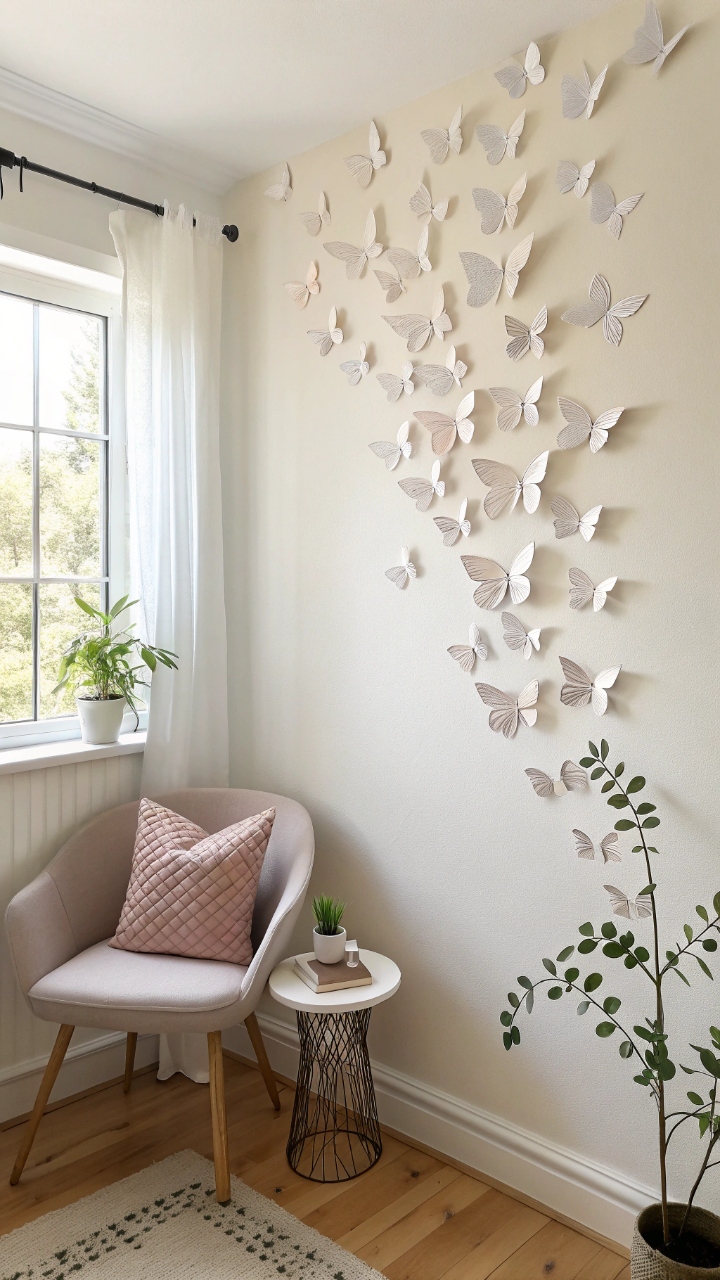
1. Classic Floating Butterfly Wall
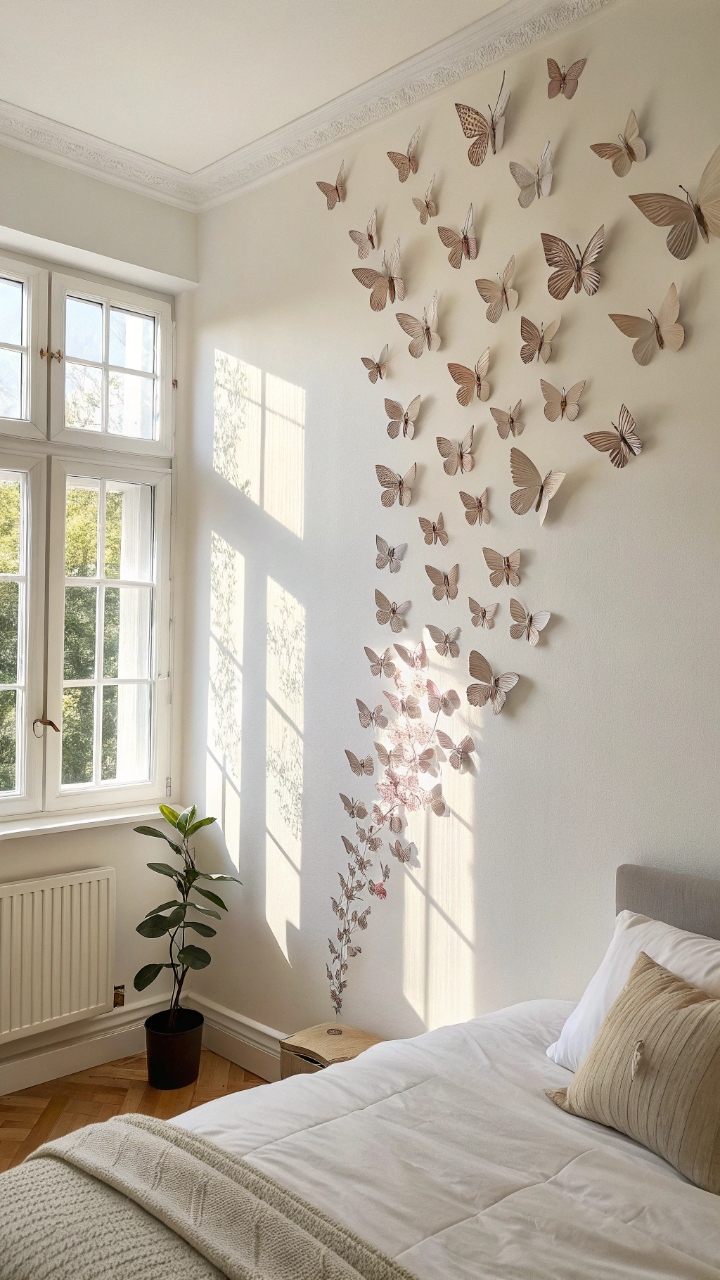
There’s something effortlessly magical about arranging butterflies so they look like they’re mid-flight across your wall, almost like they just drifted in through an open window and decided to stay. I started with a simple gradient of sizes, placing smaller butterflies at one end and gradually increasing their size to create that sense of motion, and it honestly gave the illusion of depth without needing anything fancy. The trick is to slightly bend the wings so they cast soft shadows, which makes everything feel more alive and less flat. Have you ever noticed how even the smallest detail can completely change how something feels in a room? This setup works beautifully above beds or desks where you want a subtle but eye-catching focal point.
Pro Tip: Use double-sided foam tape instead of flat tape to create that lifted, floating effect.
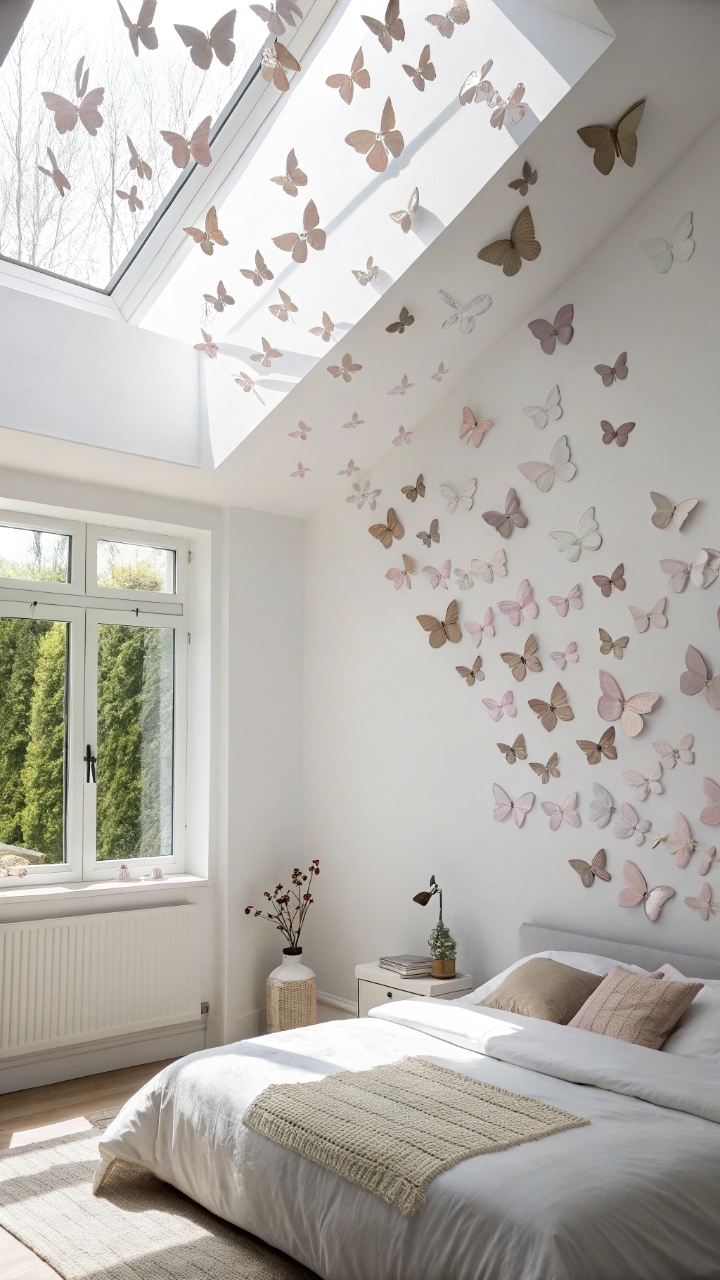
2. Ombre Butterfly Gradient Wall
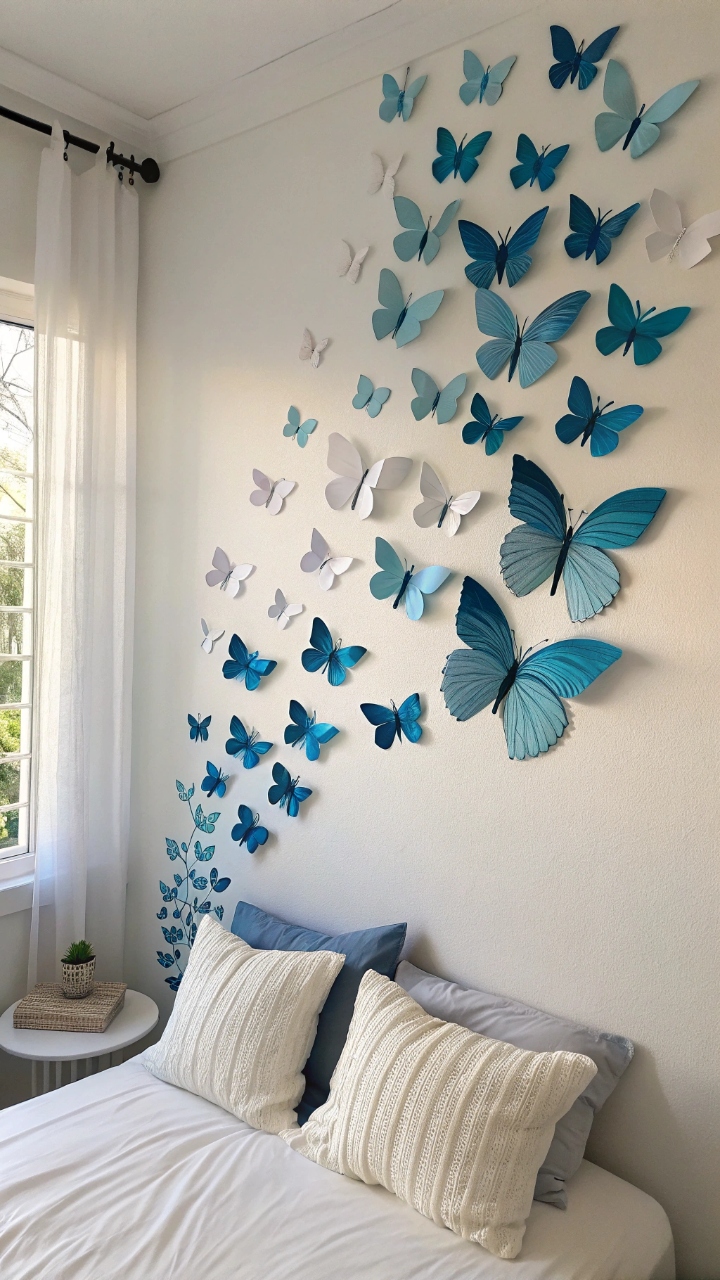
If you love color but don’t want things to feel chaotic, an ombre butterfly wall is such a satisfying way to keep everything cohesive while still making a statement. I once used shades of blue fading into white, and the result felt like a calm sky stretching across the wall, which instantly made the room feel bigger and brighter. The key is to carefully choose your color transitions so they blend naturally, almost like watercolor melting into itself. Doesn’t it feel good when a space just flows visually without trying too hard? This idea works especially well in bedrooms or creative corners where you want a soothing vibe.
Pro Tip: Lay out your butterflies on the floor first to perfect the gradient before sticking them on the wall.
3. Heart-Shaped Butterfly Arrangement
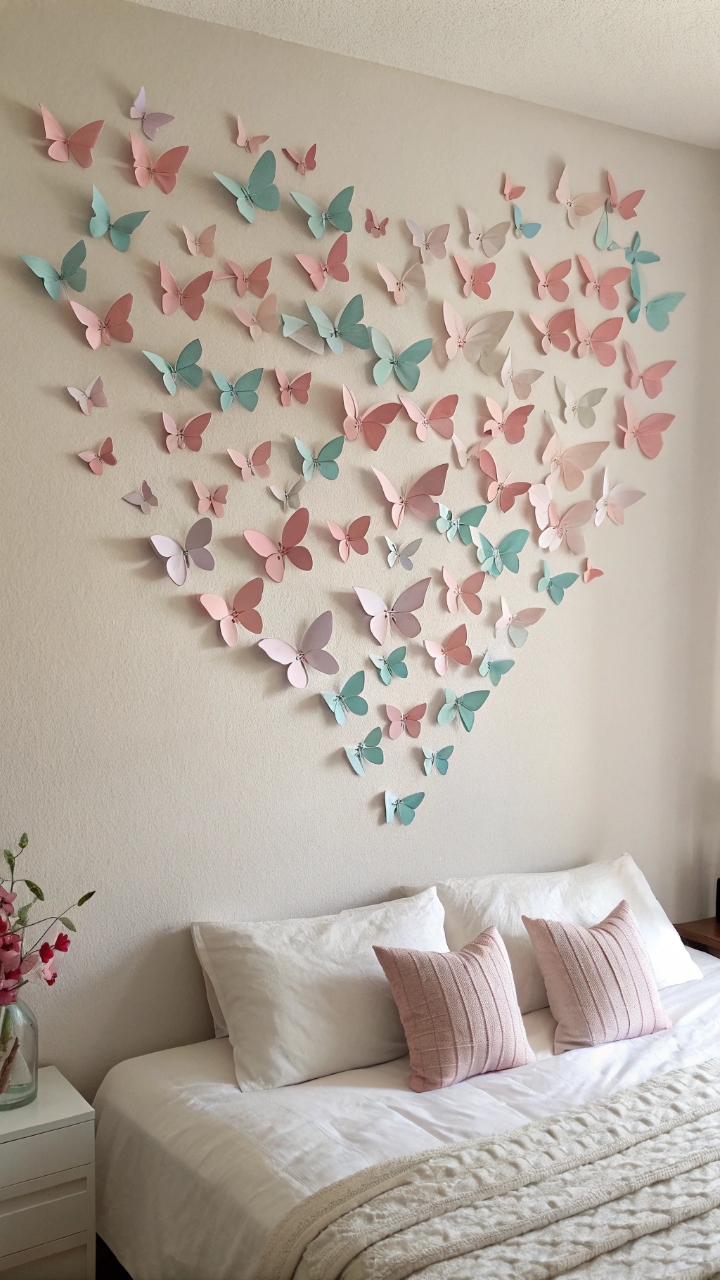
One day, I decided to arrange my butterflies into a heart shape just for fun, and it turned out way more charming than I expected, like a soft statement piece that didn’t scream for attention but still felt meaningful. The beauty of this design is how it combines structure with something delicate, creating a balance that feels both intentional and light. I used a mix of pastel shades, and the overall effect felt warm and inviting, almost like the wall itself was giving a quiet hug. Have you ever wanted decor that feels emotional without being over the top? This is that kind of piece.
Pro Tip: Outline the heart shape lightly with pencil first to keep your spacing even.
4. 3D Layered Butterfly Clusters
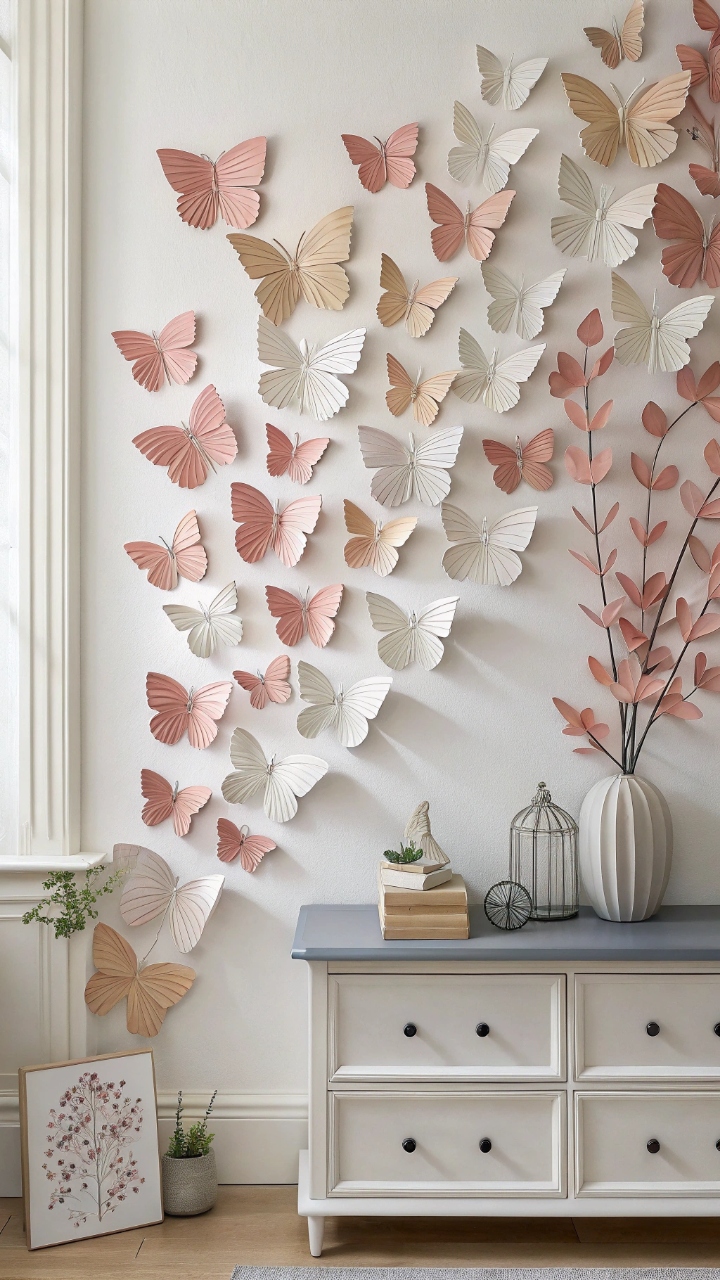
Layering butterflies on top of each other might sound simple, but it creates such a rich, textured look that feels almost like art you’d find in a gallery. I experimented with stacking different sizes and slightly offsetting them, and suddenly the wall had depth that made people stop and look closer. It’s kind of wild how paper can look so dynamic when you play with dimension a little. Don’t you love when DIY projects surprise you like that? This works beautifully as a centerpiece above a dresser or console table.
Pro Tip: Use thicker cardstock for the base layer so it supports the upper layers without drooping.
5. Butterfly Trail Around a Mirror
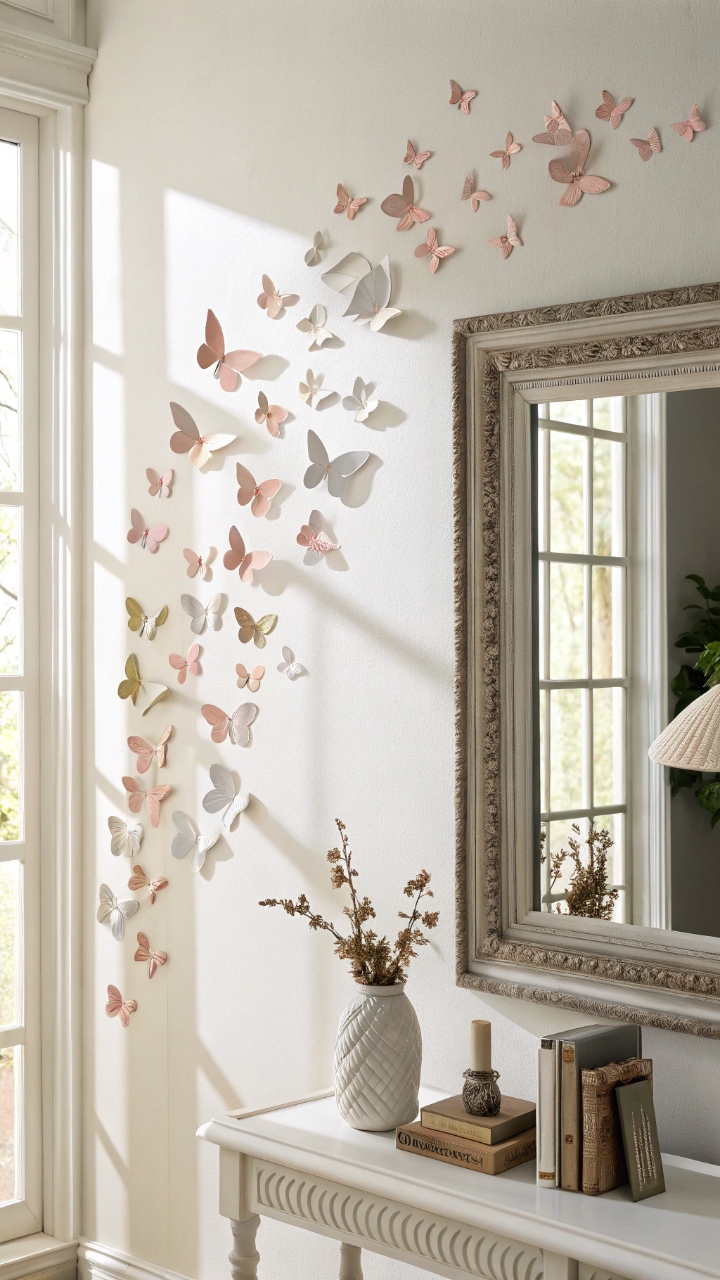
Framing a mirror with a trail of butterflies completely changed how my space felt, turning something functional into a decorative moment that actually draws your eye. I arranged them so they seemed to spiral outward, like they were escaping from the reflection, which added a playful, almost whimsical vibe. The reflection doubles the visual effect, making it feel like there are even more butterflies than there actually are. Isn’t it amazing how a small tweak can elevate something ordinary? This is perfect if you want to upgrade a basic mirror without replacing it.
Pro Tip: Keep the butterfly sizes varied to enhance the illusion of movement around the mirror.
6. Minimalist Black and White Butterfly Wall

Sometimes less really is more, and a black and white butterfly setup proves that in the cleanest, most elegant way. I tried this when I wanted something subtle, and the contrast ended up looking super polished without feeling cold. The simplicity allows the shapes to stand out, which makes the design feel intentional rather than busy. Have you ever noticed how monochrome decor can feel both modern and timeless at the same time? It’s a vibe that works in almost any room.
Pro Tip: Mix matte and slightly glossy paper finishes to add subtle visual interest.
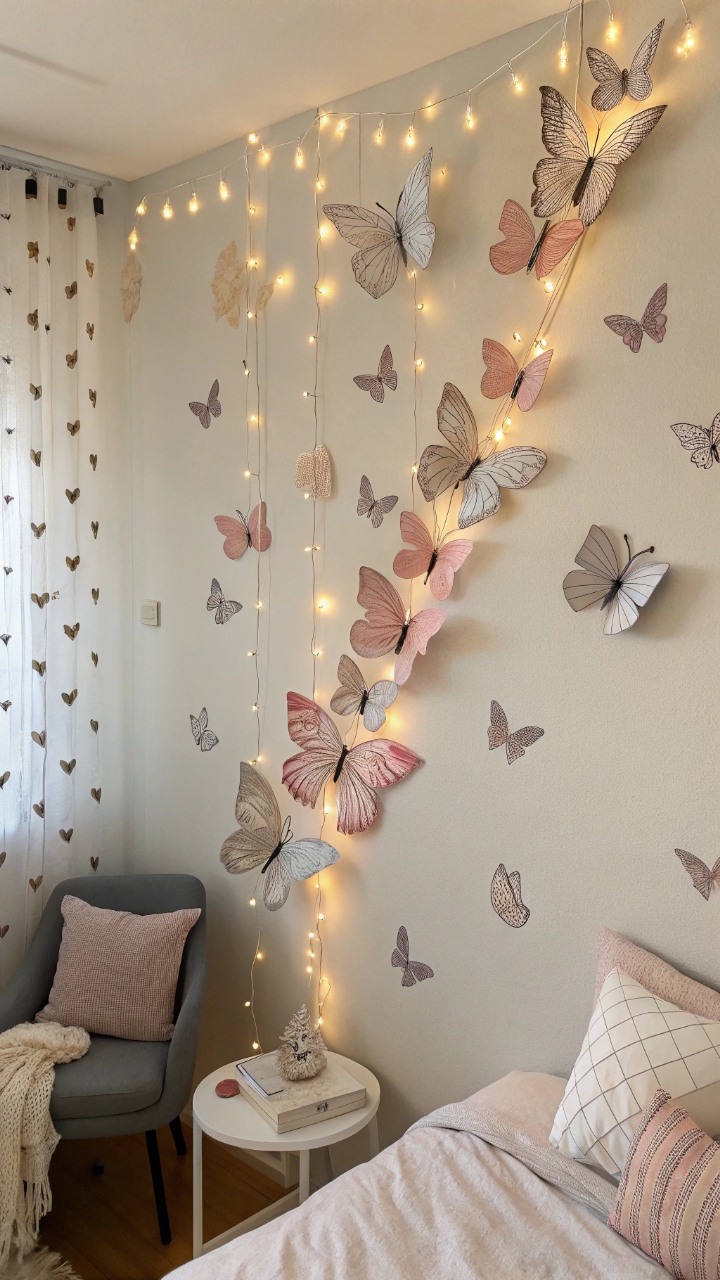
7. Butterfly Wall with Fairy Lights
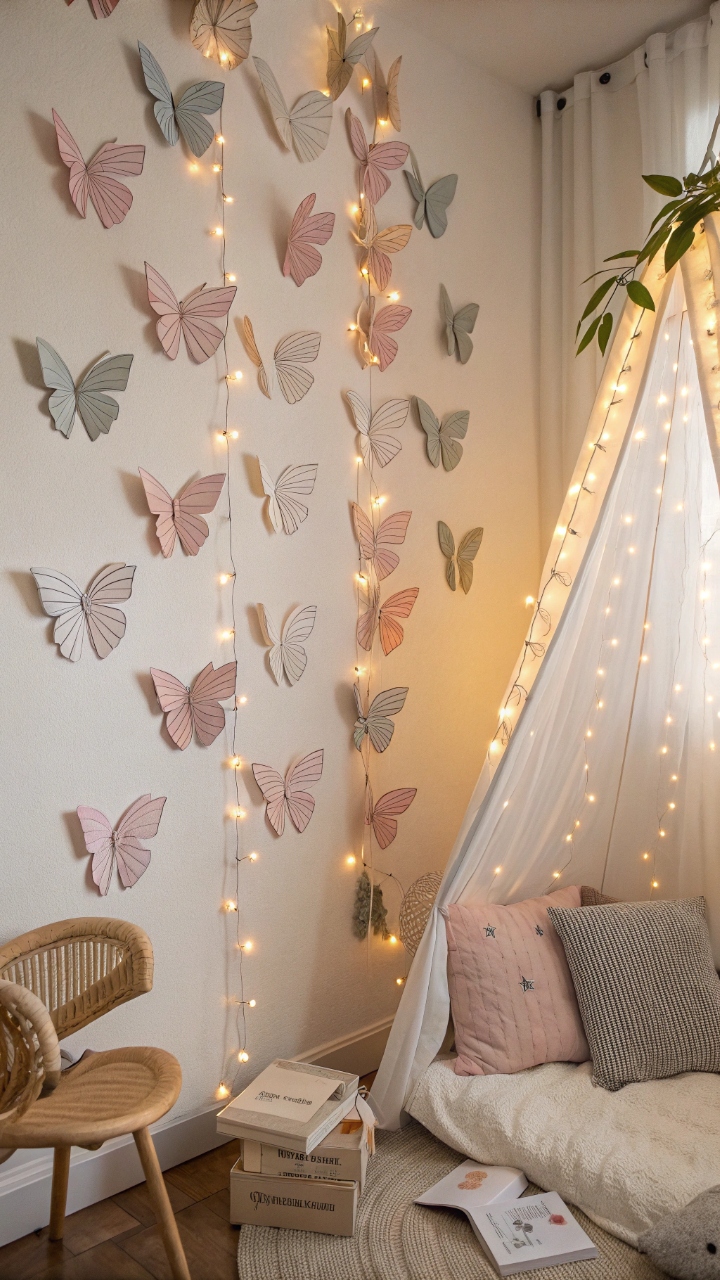
Adding fairy lights to a butterfly wall instantly creates a cozy, dreamy atmosphere that feels straight out of a Pinterest board, but in real life, it’s even better. I wove the lights gently through the arrangement, and at night, the soft glow made the butterflies look like they were gently glowing in mid-air. It’s the kind of setup that makes you want to just sit back and relax for a while. Doesn’t lighting completely change how a space feels? This idea is perfect for bedrooms or reading nooks.
Pro Tip: Use warm white lights to keep the ambiance soft and inviting.
8. Rainbow Butterfly Explosion
If you’re in the mood to go bold, a rainbow butterfly wall is pure joy, like capturing a burst of color mid-motion and freezing it on your wall. I once went all out with every color I could find, and the result was vibrant, energetic, and honestly kind of addictive to look at. It’s not subtle, but that’s exactly the point, right? Sometimes you just want your space to feel alive and unapologetically fun. This works great in creative spaces or kids’ rooms.
Pro Tip: Arrange colors in a loose spectrum to keep the chaos visually pleasing.
9. Giant Statement Butterflies
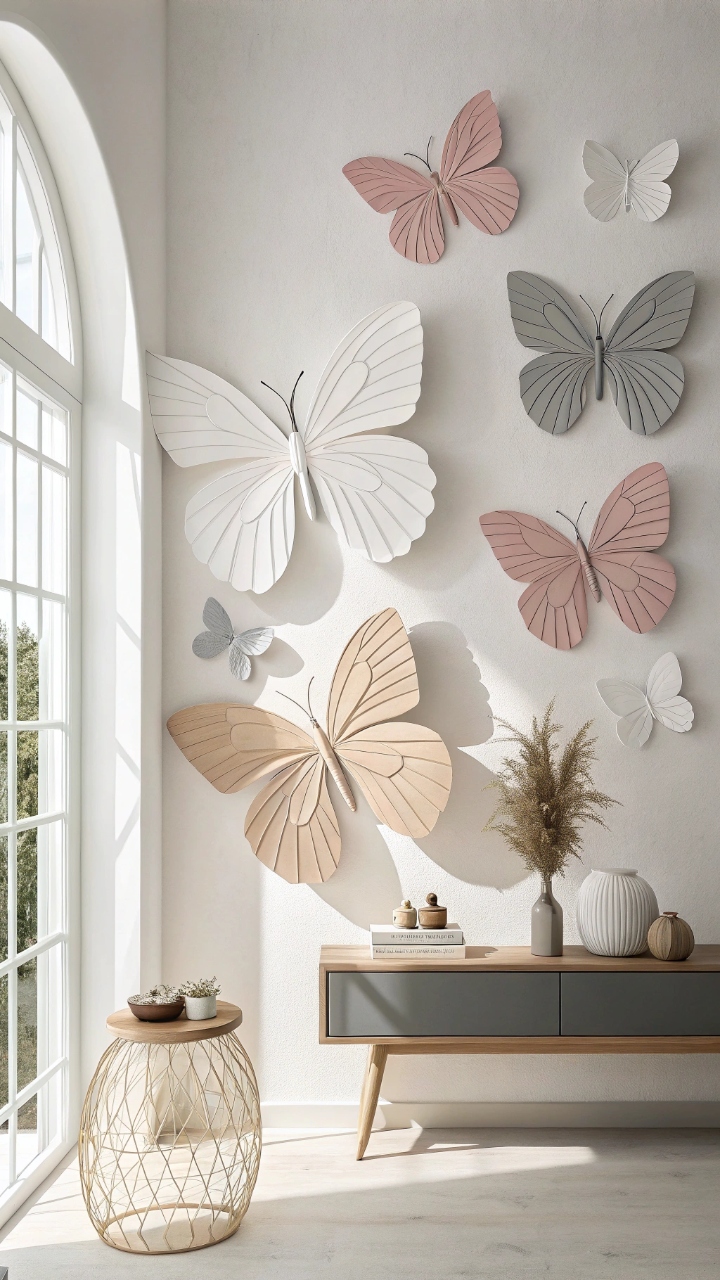
Instead of filling your wall with many small butterflies, going big with just a few oversized ones can create a bold, modern statement that feels super intentional. I cut out a few large designs and spaced them strategically, and suddenly the wall looked like a curated art piece rather than a DIY project. It’s clean, impactful, and honestly kind of chic. Have you ever tried doing less but making it bigger instead? It’s a whole different kind of confidence in decor.
Pro Tip: Use sturdy materials like poster board to keep large butterflies from curling.
10. Butterfly Corner Cascade
Transforming an empty corner with a cascade of butterflies can make an overlooked space feel special, almost like you’ve uncovered a hidden design opportunity. I arranged mine so they flowed downward from the top corner, creating a soft diagonal movement that felt natural and effortless. It draws the eye in a way that feels gentle rather than overwhelming. Isn’t it satisfying when you finally use those awkward corners creatively? This is a great way to maximize small spaces.
Pro Tip: Start from the top and work your way down to maintain a natural flow.
11. Metallic Butterfly Accent Wall
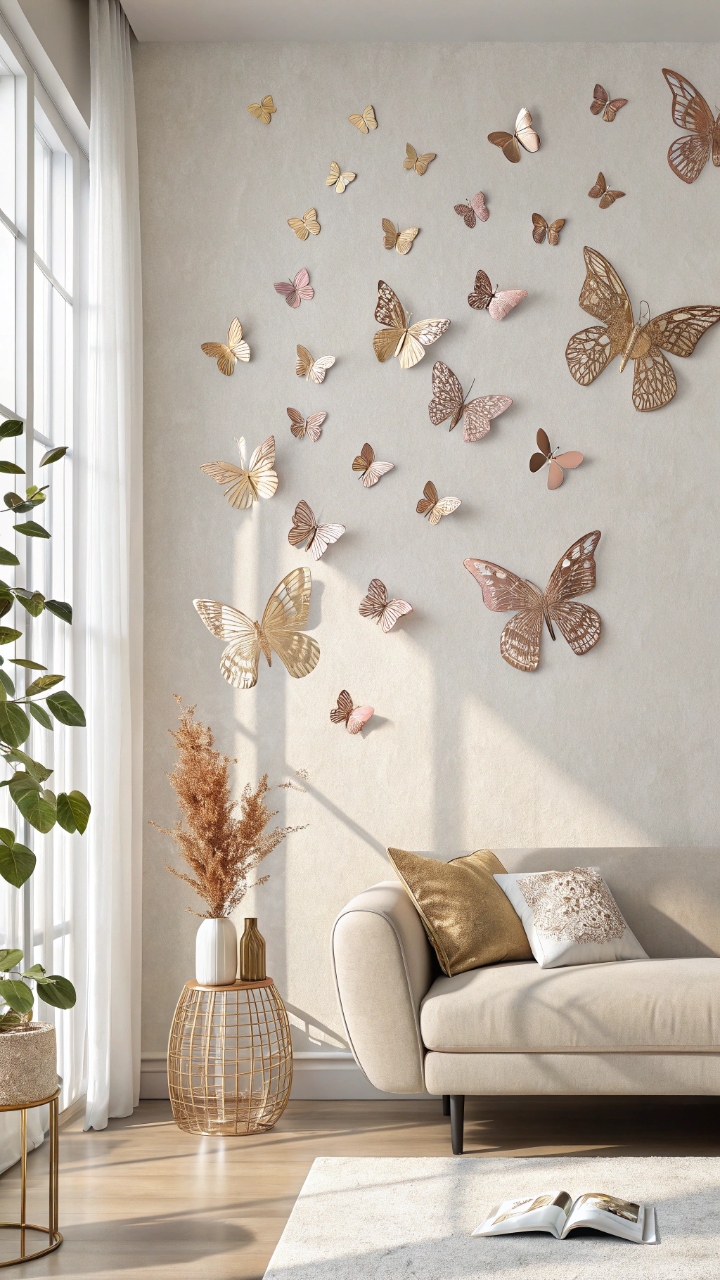
Using metallic paper adds a subtle shimmer that catches light beautifully, giving your wall a slightly glam feel without going overboard. I tried gold and rose gold tones, and during the day, the light reflections added just enough sparkle to keep things interesting. It’s classy but still playful, which is a balance I didn’t expect to love so much. Don’t you love decor that changes slightly depending on the lighting? This works well in living rooms or dressing areas.
Pro Tip: Combine metallics with neutral tones to avoid overwhelming the space.
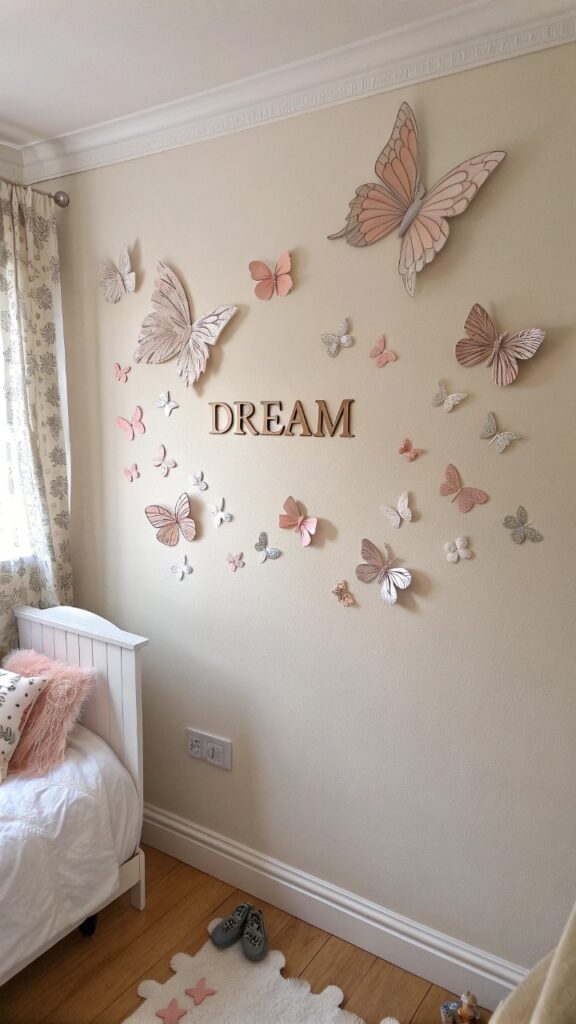
12. Personalized Name with Butterflies
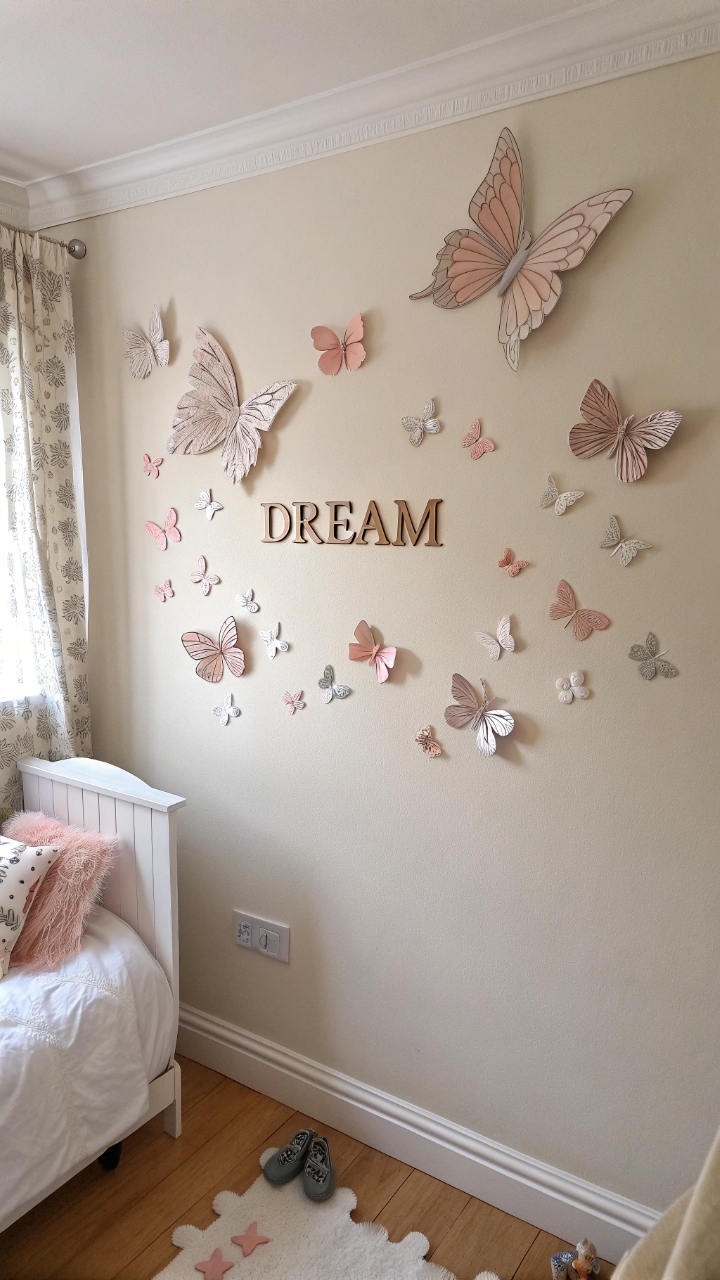
Creating a name or word out of butterfly arrangements adds a personal touch that feels unique and meaningful, especially if you’re decorating a bedroom or workspace. I once spelled out a short word and surrounded it with tiny butterflies, and it instantly made the space feel more “mine.” It’s subtle but powerful, like your wall is quietly telling your story. Have you ever wanted decor that feels deeply personal without being complicated? This idea hits that sweet spot.
Pro Tip: Use a stencil or printed guide to keep lettering neat and proportional.
13. Butterfly Wall Frame Art
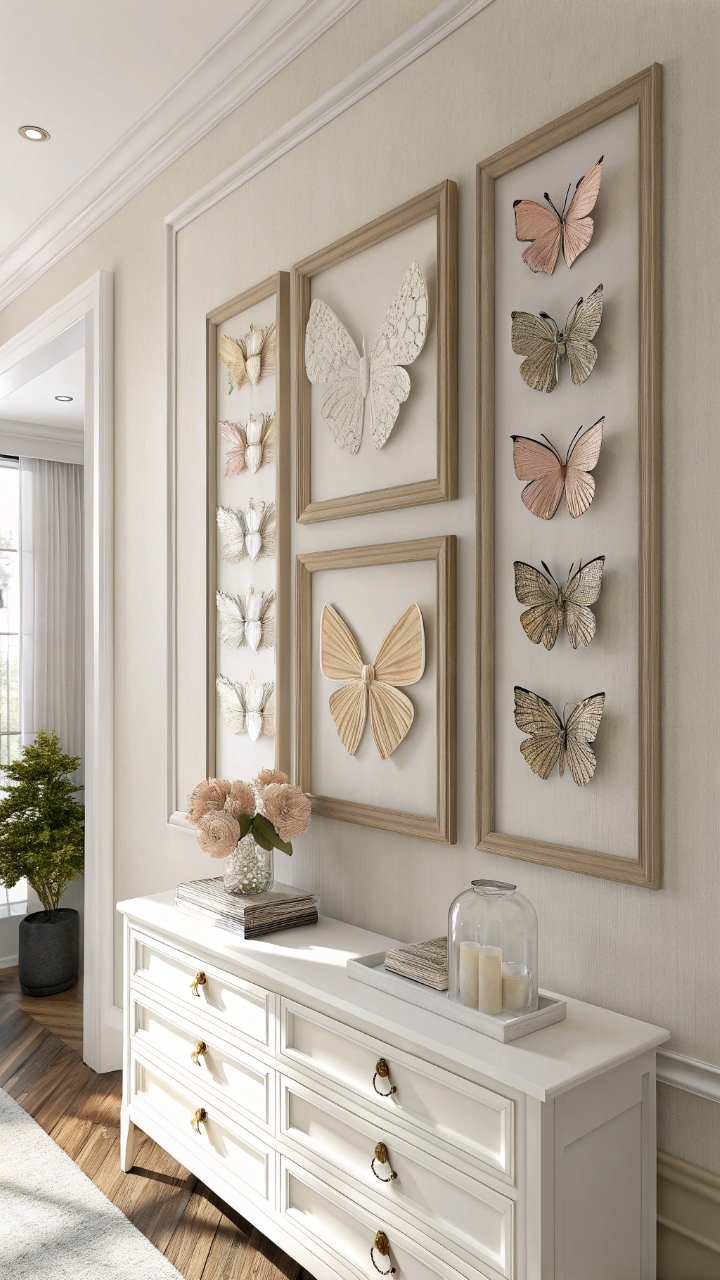
Instead of placing butterflies directly on the wall, framing them inside a large shadow box or multiple frames can give your DIY project a more polished, gallery-style look. I tried this when I wanted something less temporary, and it ended up feeling like real artwork rather than a craft project. The depth inside the frame adds dimension while keeping everything contained and tidy. Doesn’t it feel good when DIY crosses into something that looks store-bought? This is perfect for more formal spaces.
Pro Tip: Use spacers inside the frame to lift the butterflies for a 3D effect.
14. Nature-Inspired Butterfly Scene
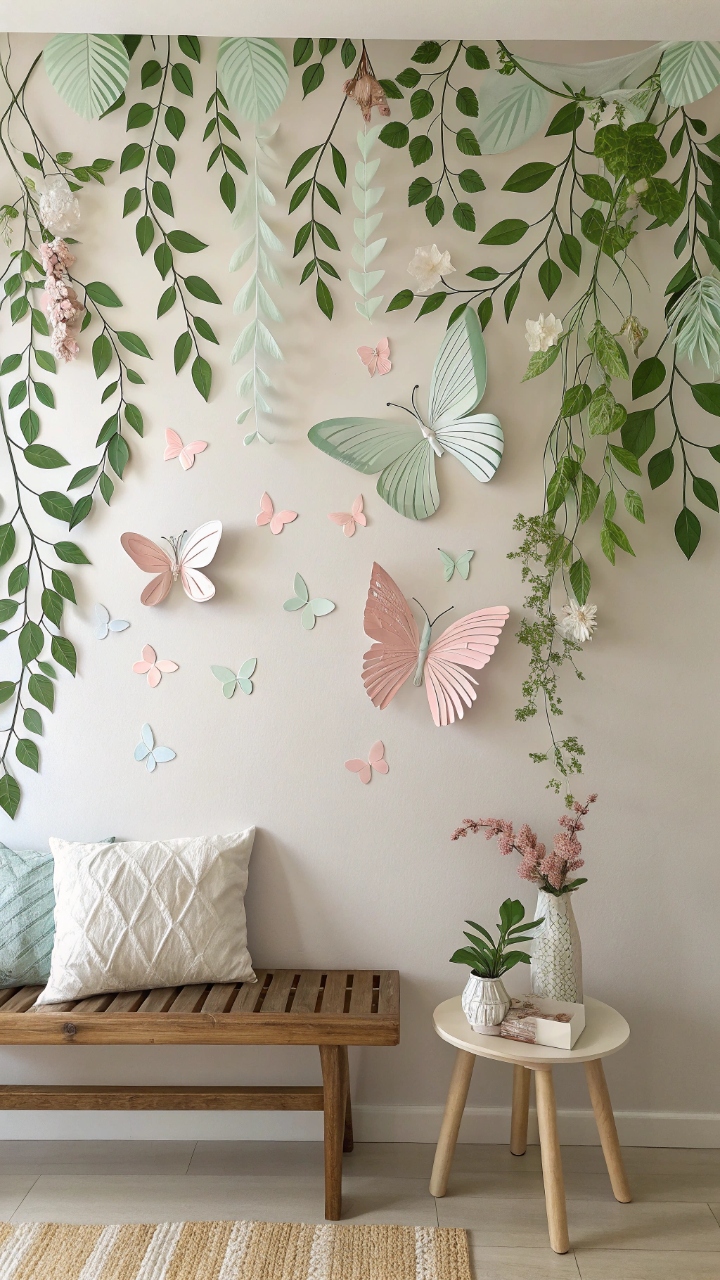
Pairing butterflies with paper leaves, flowers, or vines can turn your wall into a mini nature scene that feels fresh and calming. I combined soft green tones with pastel butterflies, and it honestly felt like bringing a bit of the outdoors inside without the maintenance. It’s peaceful, balanced, and visually soothing in a way that’s hard to explain until you see it. Have you ever craved that nature vibe indoors? This setup delivers exactly that.
Pro Tip: Stick to a consistent color palette to keep the scene cohesive.
15. Ceiling-to-Wall Butterfly Transition
Extending your butterfly design from the wall up onto the ceiling creates a stunning effect that makes the whole room feel more immersive and dynamic. I tried this on a whim, and wow, it completely changed how the space felt, like the butterflies were actually moving through the room. It’s unexpected in the best way, and it draws your eyes upward, making the room feel taller. Isn’t it fun when decor breaks the usual rules a little? This is perfect if you want something truly unique.
Pro Tip: Use lightweight paper and secure adhesive to prevent butterflies from falling over time.
Conclusion
In the end, what I love most about paper butterfly wall decor is how it reminds me that creating a beautiful space doesn’t have to be complicated or expensive to feel meaningful. There’s something deeply satisfying about crafting each piece by hand, placing it with intention, and watching your wall slowly transform into something that reflects your personality and mood. It’s not about perfection or following strict design rules, but about allowing yourself to experiment, make mistakes, and discover what feels right for you. And honestly, that process is where the real magic happens, not just in the finished result but in every step along the way.
As you try out these ideas, you might find yourself coming up with your own variations, mixing styles, or even completely reinventing the concept in a way that feels uniquely yours. That’s the beauty of DIY decor—it grows with you and evolves as your taste changes over time. Maybe you’ll start with a simple arrangement and later turn it into something more elaborate, or maybe you’ll keep it minimal and love it just as much. Either way, your space becomes a reflection of your creativity, and that’s something you can’t really buy off a shelf.
So if you’ve been waiting for the “perfect time” to refresh your walls, this is your sign to just go for it and see where your creativity takes you. Grab some paper, start cutting, and let yourself enjoy the process without overthinking every detail. You might be surprised at how something so simple can completely change how your space feels and how you feel in it too. And who knows, you might end up with a wall that makes you smile every time you walk into the room, and honestly, that’s kind of the whole point.